Theos是一个跨平台管理、开发、生成ios越狱程序的工具
Theos的配置与安装
安装dpkg
brew install dpkg
dpkg是Theos依赖的工具之一,dpkg是Debian Packager的缩写。我们可以使用dpkg来制作deb,Theos开发的插件都将会以deb的格式进行发布的。所以我在安装Theos之前要安装dpkg, 当然此处我们使用强大的brew来完成dpkg的安装。
安装ldid
brew install ldid
在Theos开发插件中,iOS文件的签名是使用ldid工具来完成的,也就是说ldid取代了Xcode自带的Codesign。
Theos安装
open ~/.bash_profile
export THEOS=/opt/theos
source ~/.bash_profile

cd opt/
sudo git clone --recursive https://github.com/theos/theos.git $THEOS
sudo curl https://ghostbin.com/ghost.sh -o $THEOS/bin/ghost
sudo chmod +x $THEOS/bin/ghost
因为我们的Theos一般是安装在/opt/目录下的,所以先cd到/opt目录下,然后从github上相关的地址clone下来即可。
下载好Theos后,要修改一下文件的权限,如下命令sudo chown $(id −u):$(id -g) theos
环境变量配置
open ~/.bash_profile

export PATH=/opt/theos/bin/:$PATH
export THEOS=/opt/theos

source ~/.bash_profile
新建工程
- 执行
nic.pl命令
localhost:theostest apple$ nic.pl
NIC 2.0 - New Instance Creator
------------------------------
  [1.] iphone/activator_event
  [2.] iphone/application_modern
  [3.] iphone/cydget
  [4.] iphone/flipswitch_switch
  [5.] iphone/framework
  [6.] iphone/ios7_notification_center_widget
  [7.] iphone/library
  [8.] iphone/notification_center_widget
  [9.] iphone/preference_bundle_modern
  [10.] iphone/tool
  [11.] iphone/tweak
  [12.] iphone/xpc_service
Choose a Template (required): 11
Project Name (required): TheosT
Package Name [com.yourcompany.theost]: com.offcn.TheosT
Author/Maintainer Name [王史超]:
[iphone/tweak] MobileSubstrate Bundle filter [com.apple.springboard]:
[iphone/tweak] List of applications to terminate upon installation (space-separated, '-' for none) [SpringBoard]:
Instantiating iphone/tweak in theost/...
Done.
模板
很简单的1-12是一对模板, 我们选择11 iphone/tweak
Project Name
项目名, 按你心意
Package Name
这个想必大家都熟悉, 是一个倒叙的唯一标示
Author/Maintainer Name
你的大名!
[iphone/tweak] MobileSubstrate Bundle filter [com.apple.springboard]
作用的APP包, 这个很重要, 这里默认是com.apple.springboard, 就是iOS的桌面程序, 那么就说明这个tweak对springboard起作用, 这是一个数组, 可以输入若干个. 至于这个包名从哪找, 在XXX.app中, 查看里面的plist文件就可以了.
[iphone/tweak] List of applications to terminate upon installation
字面意思很明显了, 程序安装完成后要kill的进程, 这里既然我们要改springboard, 自然安装后会杀掉springboard让其重启, 好检验我们的程序是否已经运行.
Done
关于Theos更详细的信息可以参考wiki
- 项目目录详解
localhost:theost apple$ ls
Makefile	TheosT.plist	Tweak.xm	control
Makefile
默认的内容为:
include $(THEOS)/makefiles/common.mk

TWEAK_NAME = TheosT
TheosT_FILES = Tweak.xm

include $(THEOS_MAKE_PATH)/tweak.mk

after-install::
	install.exec "killall -9 SpringBoard"
下面我们来逐行了解
include $(THEOS)/makefiles/common.mk 固定写法
TWEAK_NAME = testreproject 你刚刚输入的Project Name
testreproject_FILES = Tweak.xm tweak包含的源文件, 不包括库头文件什么的, 多个文件以空格分割.
include $(THEOS_MAKE_PATH)/tweak.mk 不同的工程类型, 指定不同的mk文件, 一般会用到的有Application, Tweak, Tool三种类型的程序, 那么就是对应的application.mk, tweak.mk, tool.mk三个, 按需更改.
after-install::
        install.exec "killall -9 SpringBoard"
这个更简单了, 安装之后要干的事情, 这里是杀掉SpringBoard进程. 下面介绍一下其它的常用配置:
ARCHS = armv7 armv7s arm64 //指定对应的处理器架构
TARGET = iphone:latest:8.0 //指定版本
testreproject_FRAMEWORKS = UIKit CoreAudio //导入framework
testreproject_PRIVATE_FRAMEWORKS = AppSupport ChatKit //导入私有库
testreproject_LDFLAGS = -lz -lsqlite3.0 -dylib1.o // 链接libsqlite3.0.dylib, libz.dylib和dylib1.o.
Theos采用GNU Linker来链接Mack-O对象, 包括.dylib, .a和.o.
-lx代表链接libx.a或libx.dylib, 即给”x“加上”lib“的前缀, 以及".a"或".dylib"的后缀, 如果x是"y.o"的形式, 则直接链接y.o, 不加任何前缀或后缀.
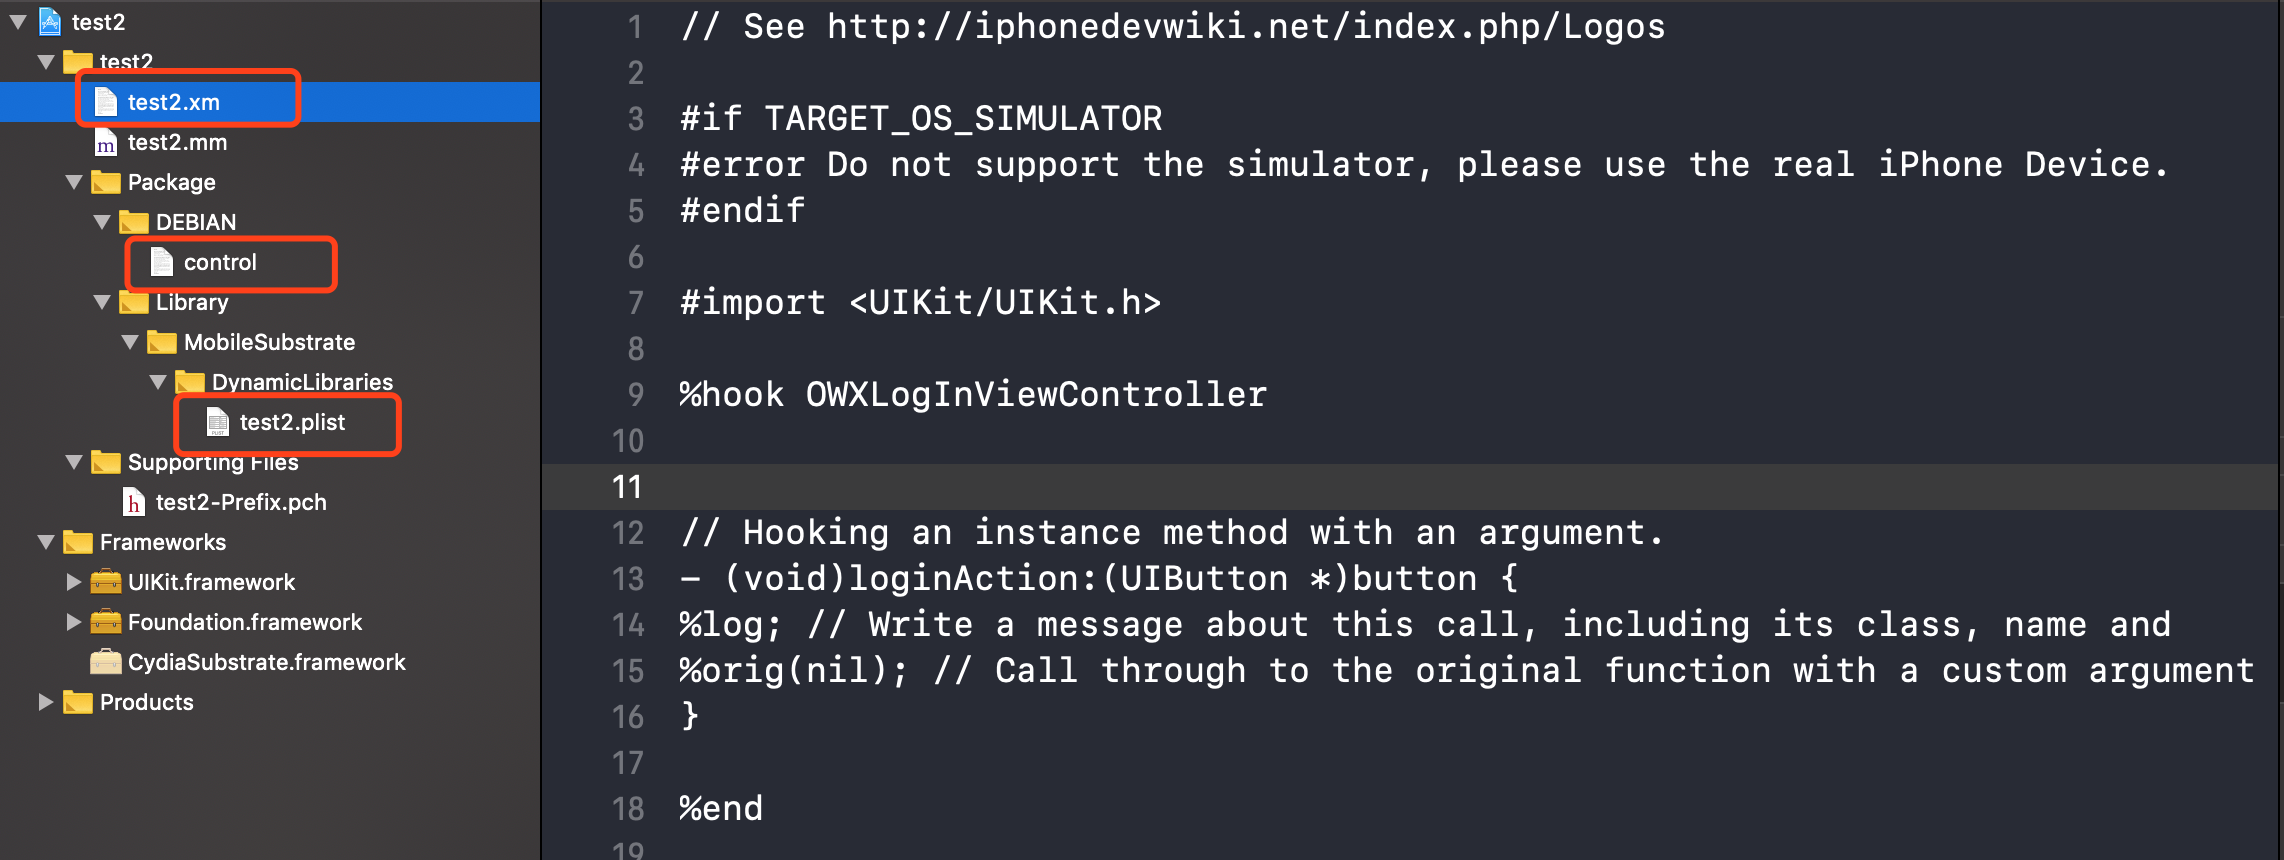
Tweak.xm
默认文件如下:
/* How to Hook with Logos
Hooks are written with syntax similar to that of an Objective-C @implementation.
You don't need to #include <substrate.h>, it will be done automatically, as will
the generation of a class list and an automatic constructor.

%hook ClassName

// Hooking a class method
+ (id)sharedInstance {
        return %orig;
}

// Hooking an instance method with an argument.
- (void)messageName:(int)argument {
        %log; // Write a message about this call, including its class, name and arguments, to the system log.

        %orig; // Call through to the original function with its original arguments.
        %orig(nil); // Call through to the original function with a custom argument.

        // If you use %orig(), you MUST supply all arguments (except for self and _cmd, the automatically generated ones.)
}

// Hooking an instance method with no arguments.
- (id)noArguments {
        %log;
        id awesome = %orig;
        [awesome doSomethingElse];

        return awesome;
}

// Always make sure you clean up after yourself; Not doing so could have grave consequences!
%end
*/
文档里写的很明白了, 如何hook和调用函数之类的, 下面只简单介绍几个主要的语法, 更详细的关于LOGO的详见这里
%hook ClassName 和 %end 这个是作为一个结构存在的, 表示开始和结束
%orig 执行原始函数
%orig(nil, nil); 执行原始函数, 并自定义参数值, 如果用这种函数, 必须写明所有的参数.
control
control文件记录了deb包管理系统所需的基本信息, 会被打包进deb包里.
Package: com.yourcompany.testreproject
Name: testreproject
Depends: mobilesubstrate
Version: 0.0.1
Architecture: iphoneos-arm
Description: An awesome MobileSubstrate tweak!
Maintainer: wangyu
Author: wangyu
Section: Tweaks
Package
用于描述这个deb包的名字, 采用的命名方式同bundle identifier类似, 均为反向DNS格式. 可以按需更改.
Name
用于描述这个工程的名字, 可以按需更改.
Depends
用于描述这个deb包的依赖.
依赖指的是这个程序运行的基本条件, 可以填写固件版本或其它程序, 如果当前iOS不满足依赖中定义的条件, 则此tweak无法正常运行.
如: Depends:mobilesubstrate,firmware(>=8.0)表示当前iOS版本必须在8.0以上, 且必须安装CydiaSubstrate才能正常运行这个tweak, 可以按需更改.
Version
用于描述这个deb包的版本号, 可以按需更改.
Architecture
用于描述deb包安装的目标设备架构, 不要更改.
Description
是deb包的简介, 可以更改.
Maintainter
用于描述deb包的维护人, 可以按需更改.
Author
用于描述tweak的作者, 可以按需更改.
Section
用于描述deb包所属的程序类别, 不要更改.
Done
关于control文件的更多信息可以访问这里
testreproject.plist
{ Filter = { Bundles = ( "com.apple.springboard" ); }; }
该plist文件的作用和App中的Info.plist类似, 它记录了一些配置信息, 描述了tweak的作用范围. 通过Xcode打开该文件, 我们可以看到它的最外层是一个Dictionary, 只有一个名为”Filter”的键. Filter下是一系列Array, 可以分为三类:
Bundle
指定若干bundle为tweak的作用对象. 如:com.apple.springboard
Classes
指定若干class为tweak的作用对象. 如:NSString
Executables:
指定若干可执行文件为tweak的作用对象. 如:callservicesd 这三类Array可以混合使用, 但当Filter下有不同类的Array时, 需要添加一个”Mode: Any”键值对. 当Filter下的Array只有一类时, 不需要添加.
- 编译, 打包, 安装
编译
在根目录下使用make命令就编译了, 生成/obj/debug目录
打包
使用”make package”命令来打包.
执行完成后会在工程目录下生成/packages/xxx.deb文件.该文件就是可以直接安装在iOS上的安装包.
安装
- 可以利用其它工具导入手机目录, 进行安装, 这里不做赘述
- 使用SSH进行安装
- 首先在手机里安装openSSH.
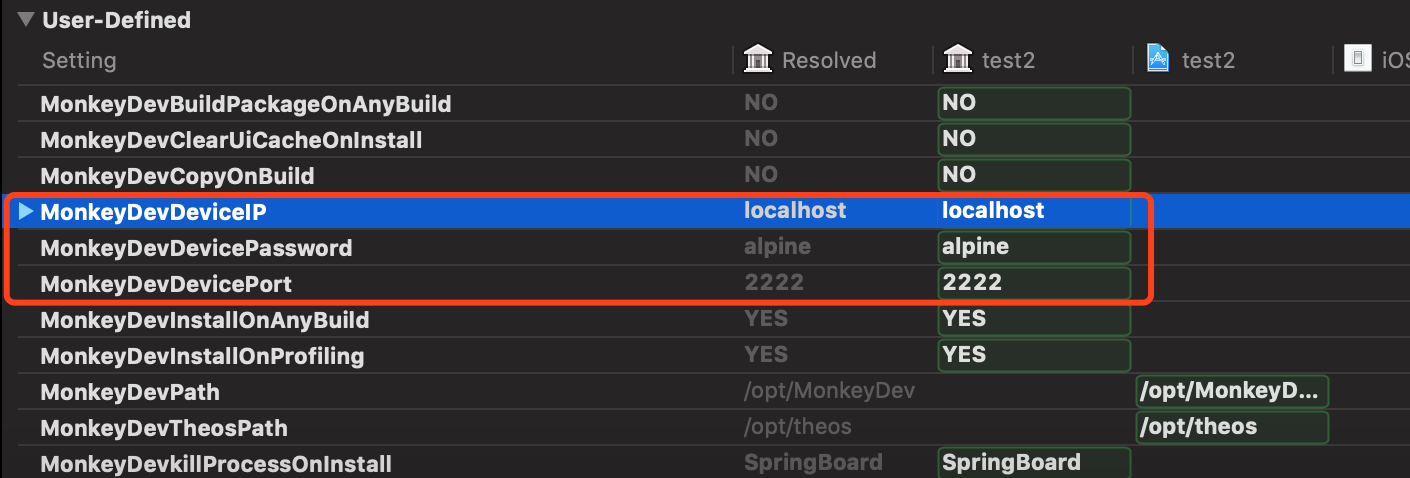
- 在Makefile中加入以下export THEOS_DEVICE_IP = 192.168.6.55 (手机IP)
- 然后make后执行
- make package install 输入密码, 安装成功!
- 其它常见错误
==> Error:/Applications/Xcode.app/Contents/Developer/usr/bin/make install requires that you set THEOS_DEVICE_IP in your environment.
==> Notice:It is also recommended that you have public-key authentication set up for root over SSH, or you will be entering your password a lot.
make: *** [internal-install] Error 1
如果出现这个错误, 那么export THEOS_DEVICE_IP=127.0.0.1
也可以将其加入到之前提到的base_profile里, 一劳永逸!.
最终会在“Device->Library->MobileSubstrate->DynamicLibraries”下生成动态库文件
/opt/theos/bin/logify.pl 头文件可以生成hook代码
localhost:leci apple$ /opt/theos/bin/logify.pl LCActivityController.h
%hook LCActivityController
+ (id)sharedInstance { %log; id r = %orig; HBLogDebug(@" = %@", r); return r; }
- (void)checkActivitysWithUid:(id)arg1 orderID:(id)arg2 orderState:(id)arg3 block:(CDUnknownBlockType)arg4 { %log; %orig; }
%end
Monkey Logos Tweak
安装下面插件:
brew install https://raw.githubusercontent.com/kadwanev/bigboybrew/master/Library/Formula/sshpass.rb
Monkey CaptainHook Tweak
配置同上
// 需要Hook的类
@class ClassToHook;

// 加载类
CHDeclareClass(ClassToHook); // declare class

CHOptimizedMethod(0, self, void, ClassToHook, messageName) // hook method (with no arguments and no return value)
{
	// write code here ...

	CHSuper(0, ClassToHook, messageName); // call old (original) method
}

// 需要Hook的方法
// 2: 代表有几个参数
// self: 当前类
// BOOL: 返回值
// ClassToHook: Hook对象
// arg1,NSString*, value1:参数1,参数1类型,参数值
// arg2,BOOL, value2:参数2,参数2类型,参数值

CHOptimizedMethod(2, self, BOOL, ClassToHook, arg1, NSString*, value1, arg2, BOOL, value2) // hook method (with 2 arguments and a return value)
{
	// write code here ...

	return CHSuper(2, ClassToHook, arg1, value1, arg2, value2); // call old (original) method and return its return value
}

static void WillEnterForeground(CFNotificationCenterRef center, void *observer, CFStringRef name, const void *object, CFDictionaryRef userInfo)
{
	// not required; for example only
}

static void ExternallyPostedNotification(CFNotificationCenterRef center, void *observer, CFStringRef name, const void *object, CFDictionaryRef userInfo)
{
	// not required; for example only
}

// 初始化

CHConstructor // code block that runs immediately upon load
{
	@autoreleasepool
	{
		// listen for local notification (not required; for example only)
		CFNotificationCenterRef center = CFNotificationCenterGetLocalCenter();
		CFNotificationCenterAddObserver(center, NULL, WillEnterForeground, CFSTR("UIApplicationWillEnterForegroundNotification"), NULL, CFNotificationSuspensionBehaviorCoalesce);

		// listen for system-side notification (not required; for example only)
		// this would be posted using: notify_post("com.offcn.CRMHook.eventname");
		CFNotificationCenterRef darwin = CFNotificationCenterGetDarwinNotifyCenter();
		CFNotificationCenterAddObserver(darwin, NULL, ExternallyPostedNotification, CFSTR("com.offcn.CRMHook.eventname"), NULL, CFNotificationSuspensionBehaviorCoalesce);

		// 及时加载
		// CHLoadClass(ClassToHook); // load class (that is "available now")
		// 稍后加载
		// CHLoadLateClass(ClassToHook);  // load class (that will be "available later")

		// 注册
		CHHook(0, ClassToHook, messageName); // register hook
		CHHook(2, ClassToHook, arg1, arg2); // register hook
	}
}
例子:
@class LCStartViewController;

CHDeclareClass(LCStartViewController); // declare class

CHOptimizedMethod(1, self, void, LCStartViewController, phoneLoginAction, id, value1) // hook method (with 2 arguments and a return value)
{
    // write code here ...

    NSLog(@"LCStartViewController hook");
    return CHSuper(1, LCStartViewController, phoneLoginAction, value1); // call old (original) method and return its return value
}

static void WillEnterForeground(CFNotificationCenterRef center, void *observer, CFStringRef name, const void *object, CFDictionaryRef userInfo)
{
    NSLog(@"进入前台");
    // not required; for example only
}

static void ExternallyPostedNotification(CFNotificationCenterRef center, void *observer, CFStringRef name, const void *object, CFDictionaryRef userInfo)
{
    // not required; for example only
}

CHConstructor // code block that runs immediately upon load
{
    @autoreleasepool
    {
        // listen for local notification (not required; for example only)
        CFNotificationCenterRef center = CFNotificationCenterGetLocalCenter();
        CFNotificationCenterAddObserver(center, NULL, WillEnterForeground, CFSTR("UIApplicationWillEnterForegroundNotification"), NULL, CFNotificationSuspensionBehaviorCoalesce);

        // listen for system-side notification (not required; for example only)
        // this would be posted using: notify_post("com.offcn.CRMHook.eventname");
        CFNotificationCenterRef darwin = CFNotificationCenterGetDarwinNotifyCenter();
        CFNotificationCenterAddObserver(darwin, NULL, ExternallyPostedNotification, CFSTR("com.offcn.CRMHook.eventname"), NULL, CFNotificationSuspensionBehaviorCoalesce);

         CHLoadLateClass(LCStartViewController);  // load class (that will be "available later")

        CHHook(1, LCStartViewController, phoneLoginAction); // register hook
    }
}
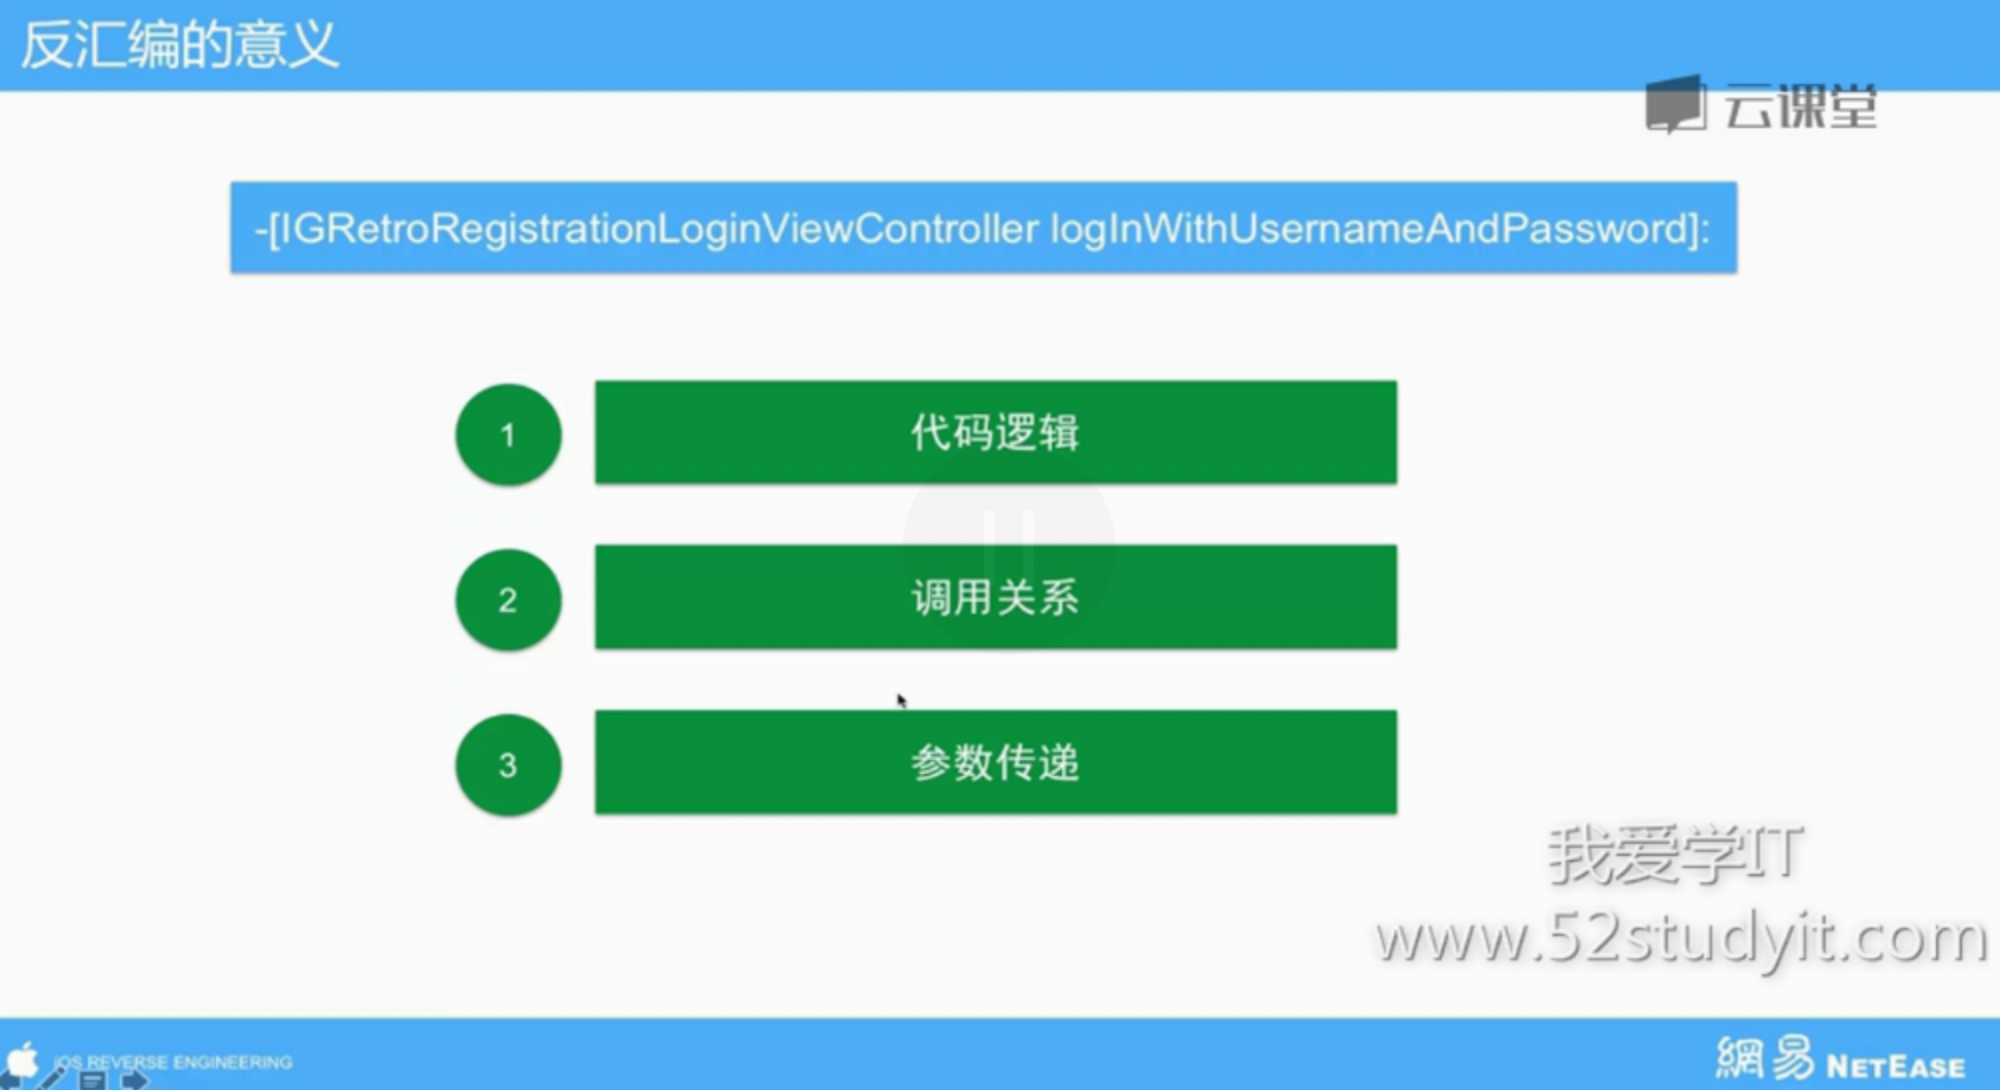
静态调试
静态分析是在不执行ios的情况下,对应用进行分析的一种方法。
包括分析文件结构、文件二进制、反汇编。
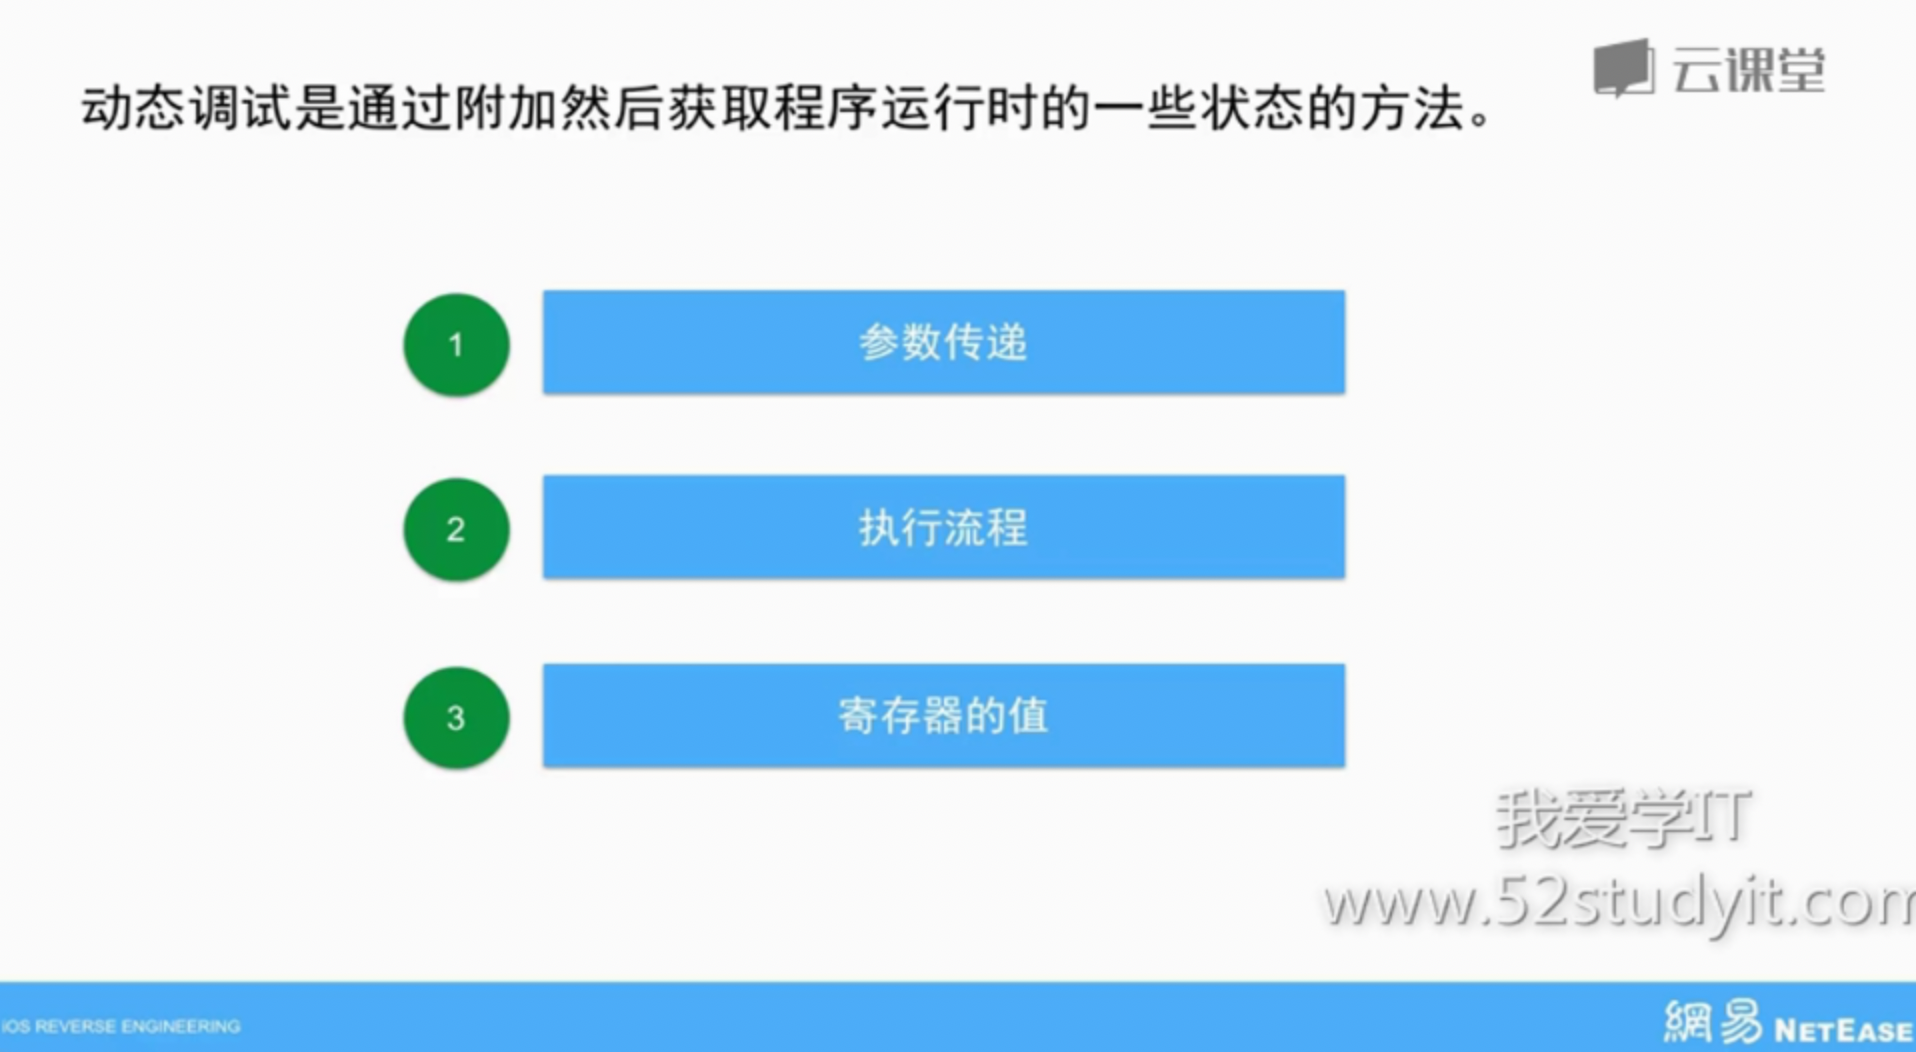
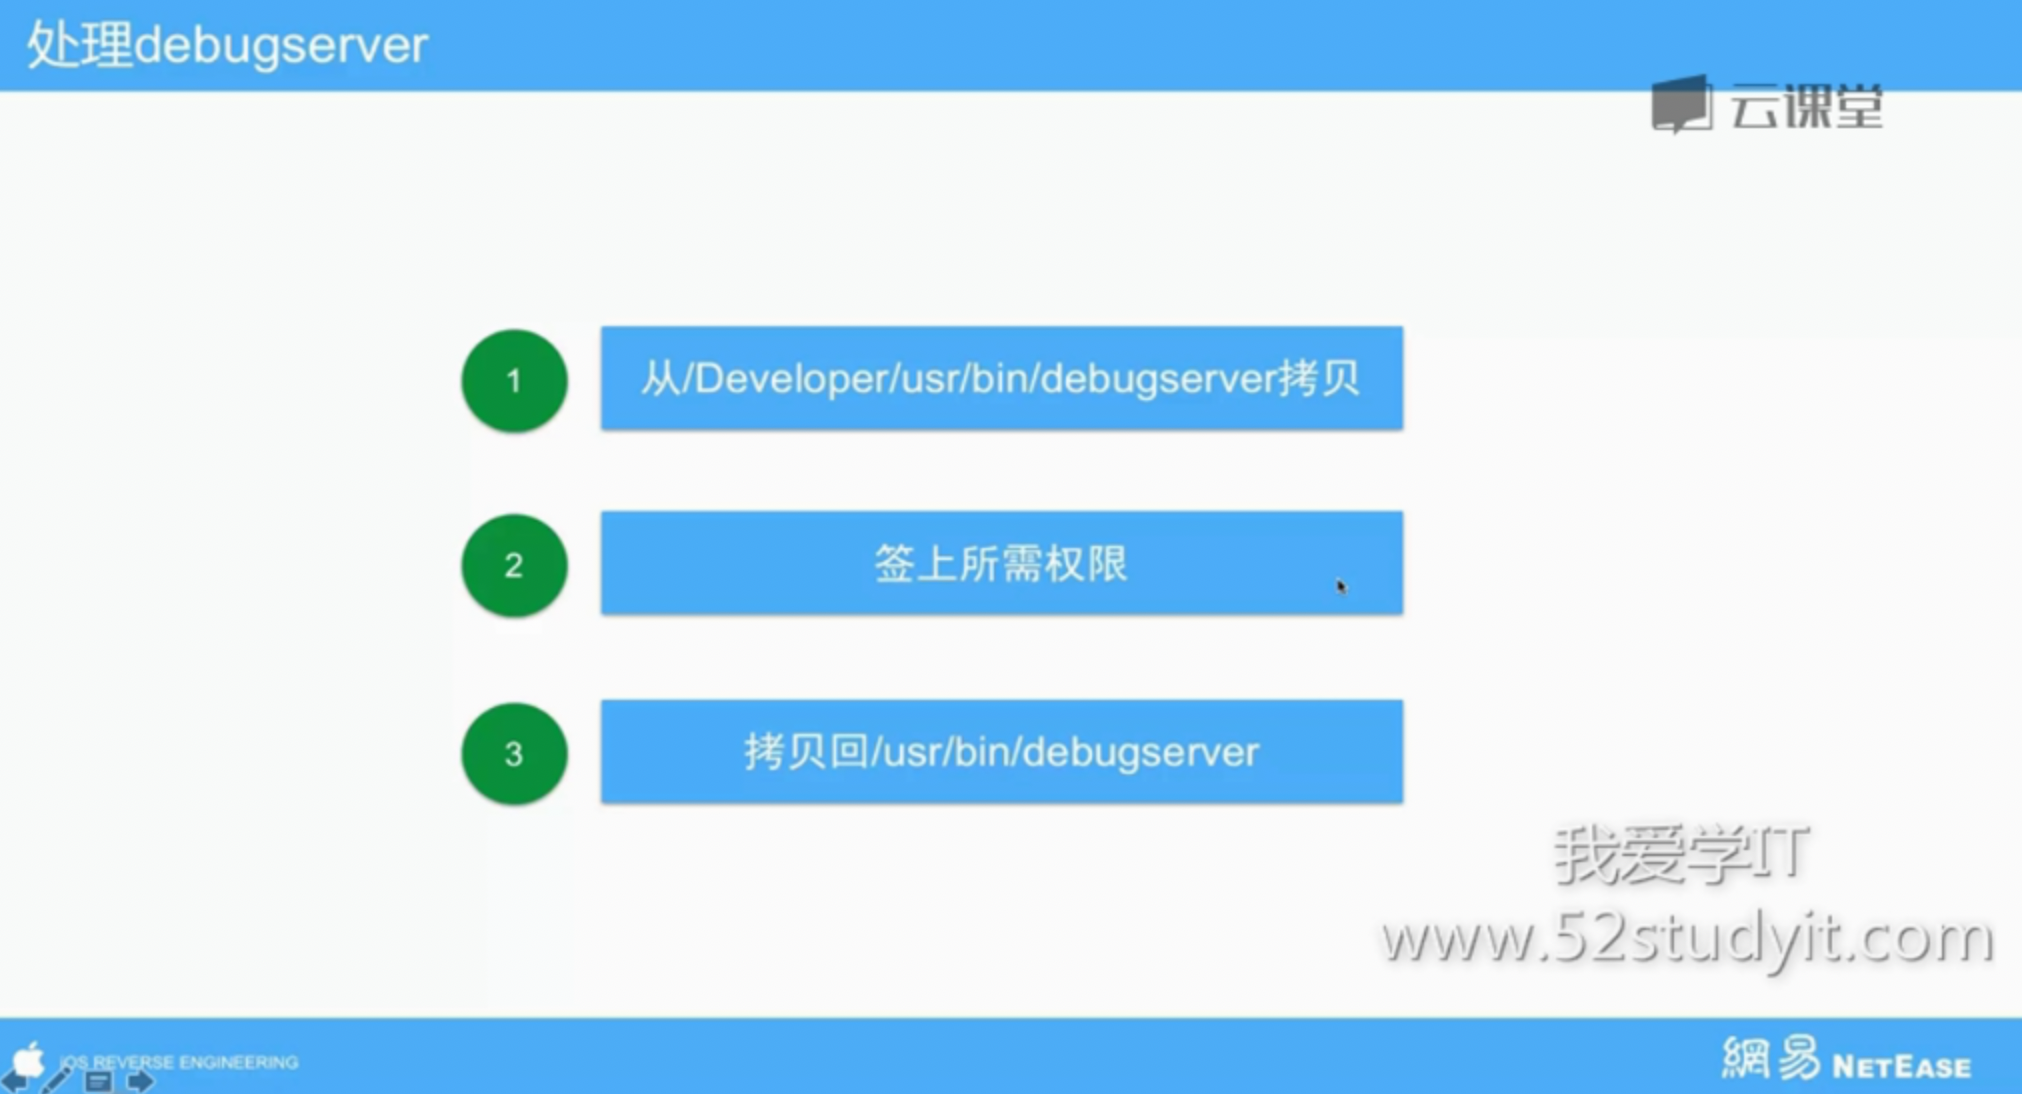
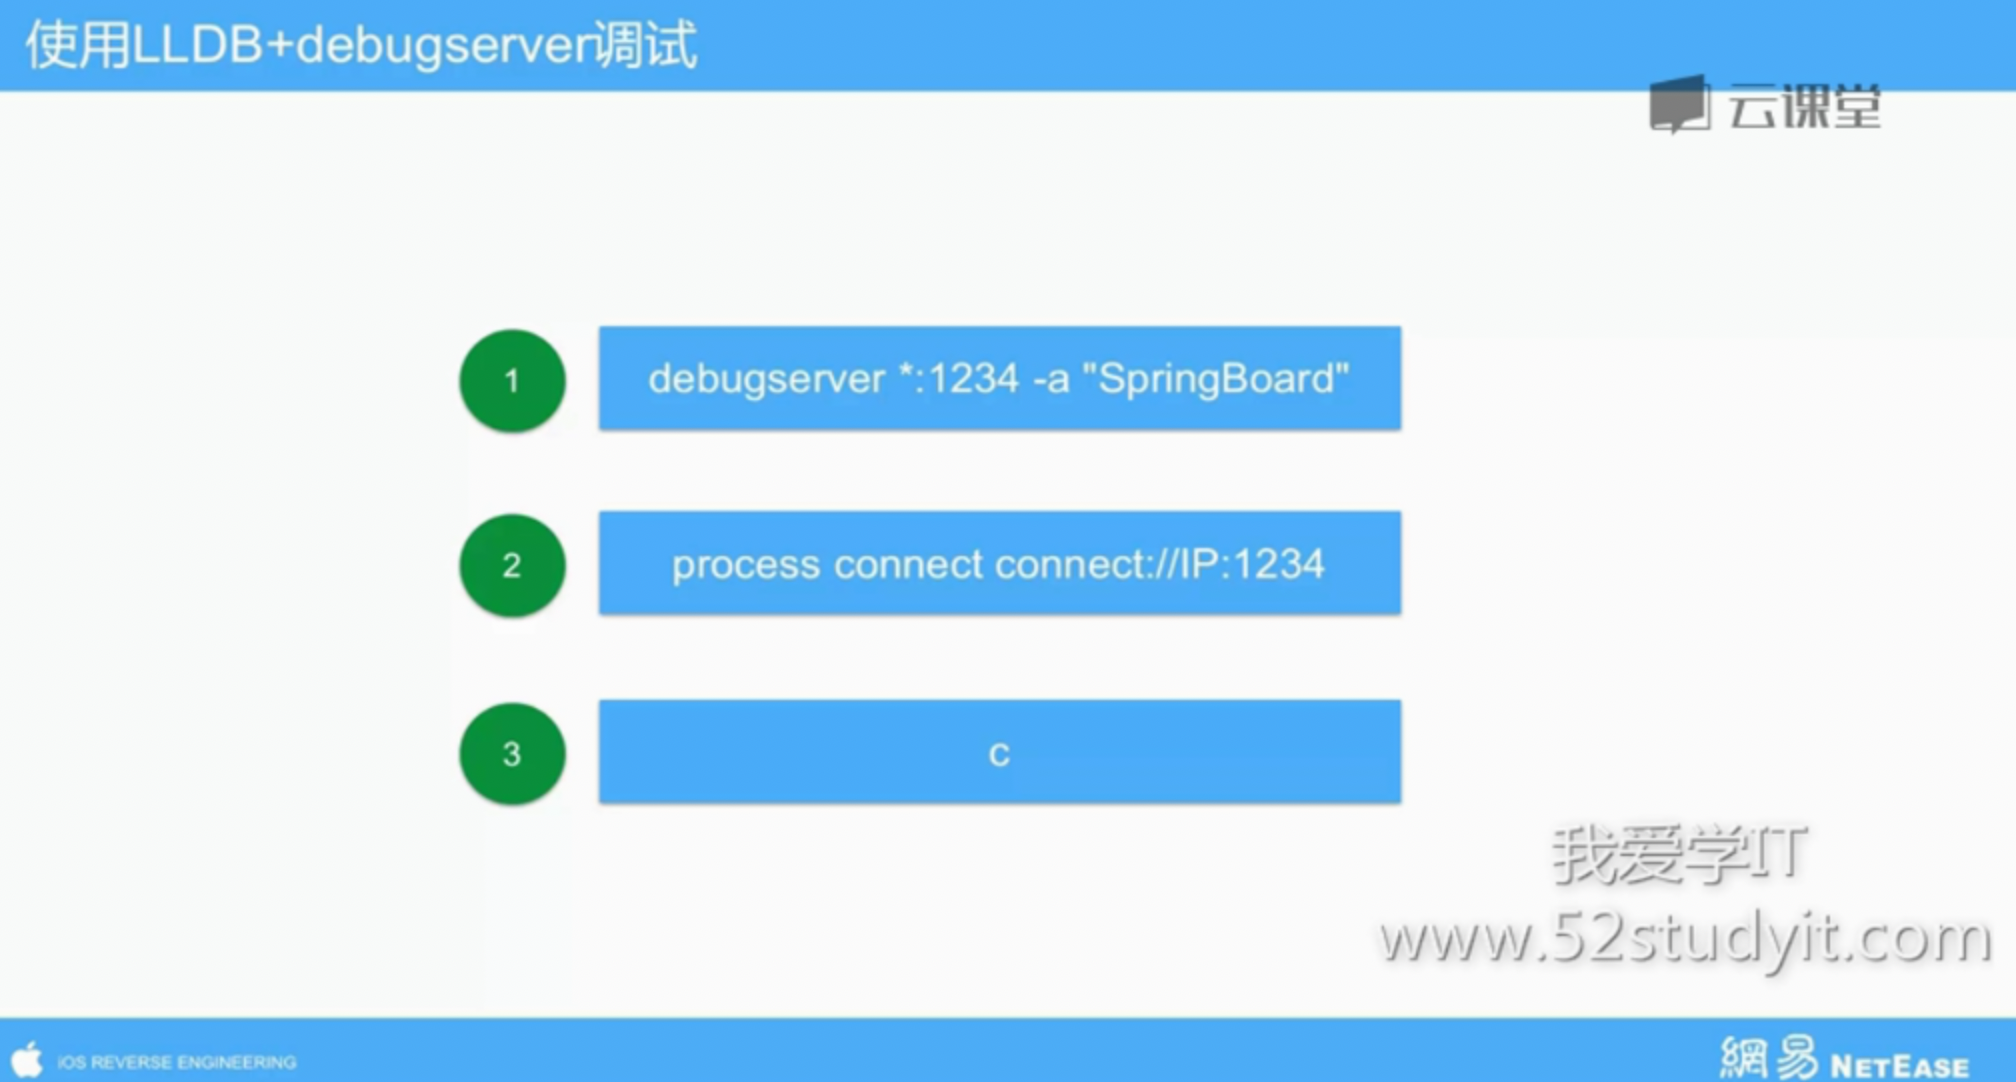
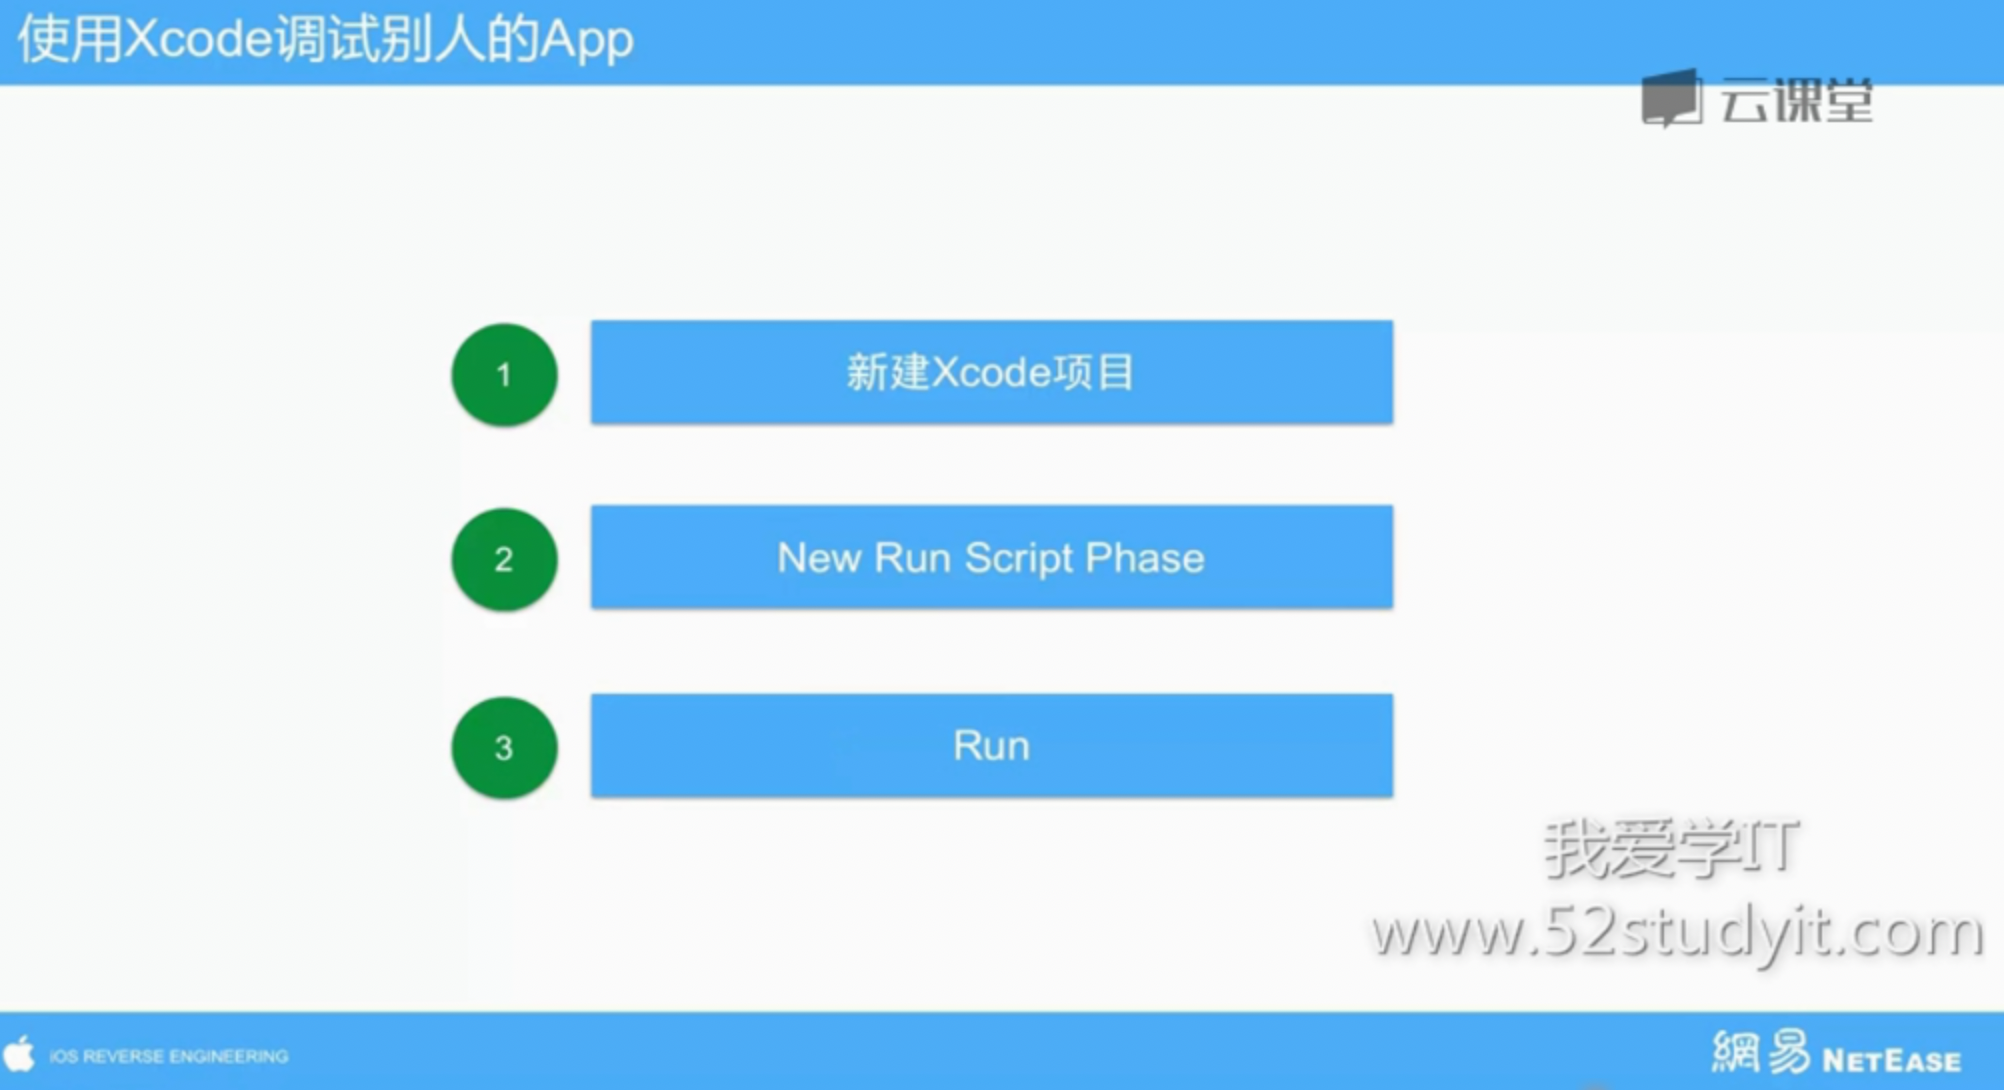
动态分析